こんにちは。
ASDK のAzure 登録が完了したら、Marketplace Management から 仮想マシンイメージなどをダウンロードできるようになります。そのイメージを利用して、今回は MS SQL を PaaS サービスとして登録してみたいと思います。
MS DBaaS を提供するには、MS SQL Resource Provider と DB をホストするホスティングサーバーを構成する必要があります。今回は MS SQL RP の設定を行います。
MS SQL RP の登録方法はこちらに記載されています。
1、MS SQL RP を追加するために、Marketplace Management から Windows Server 2016 Datacenter Core のイメージをダウンロードします。

2、ダウンロードが完了したら Privileged Endpoint VM にアクセスできるサーバーにログインします。ASDK の場合は、ホストにログインすれば OK です。

3、SQL Resource Provider のバイナリをダウンロードし、実行します。利用している ASDK のバージョンによって、ダウンロードするバイナリが異なるので注意してください。
※ 2018年2月3日 時点で公開されているものです。
ダウンロードしたバイナリを実行すると、いくつかのファイルが展開されます。このファイルを利用して、SQLRP をインストールします。

4、Azure PowerShell Version 1.2.11 がインストールされているか確認します。
Get-Module -ListAvailable | where-Object {$_.Name -like “Azure*”}
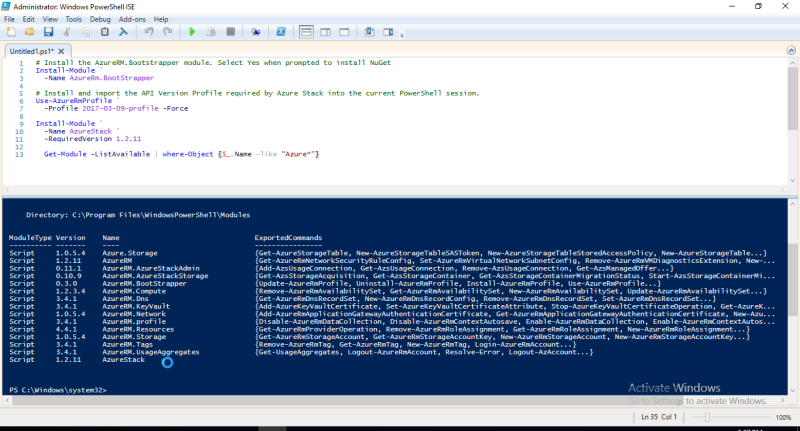
Script 1.2.11 AzureRM と Script 1.2.11 AzureStack が表示されていれば問題なしです。
インストールされていない場合は、下記の手順を実施してください。
Install Azure PowerShell version 1.2.11.
5、マルチノードの場合は PaaS 用に証明書を準備する必要があるのですが、ASDK は SQL RP をインストールする際に一緒に構成してもらえるので、証明書に関して気にする必要はありません。
6、Powershell を管理者権限で実行し、SQL RP のバイナリを展開したフォルダに移動します。
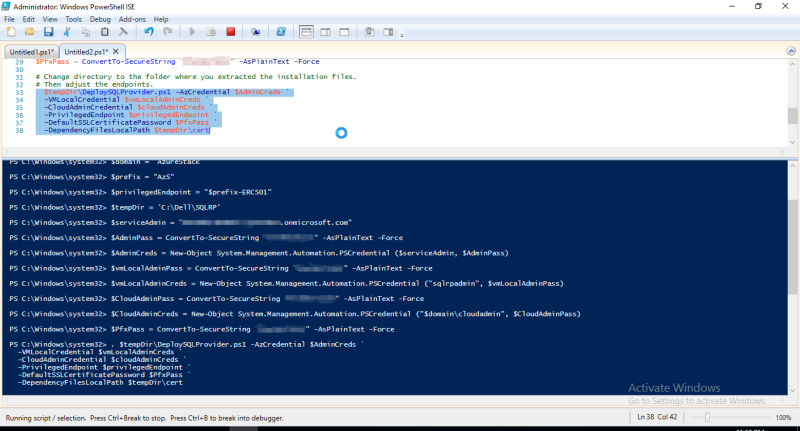
7、DeploySqlProvider.ps1 を実行します。SQLRP のインストールにはしばらくかかりますが、90 分以上経っても完了しない場合は失敗の可能性があるみたいです。私の環境では、40分くらいで完了しました。
スクリプト開始
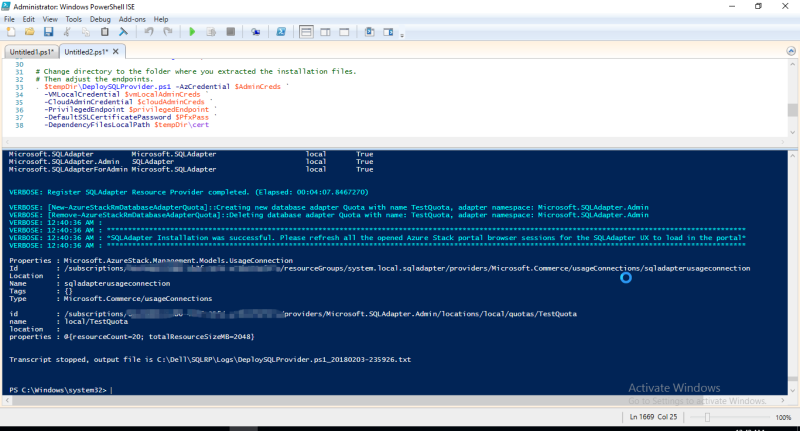
スクリプト完了
DeploySqlProvider.ps1 のオプションが結構多いですが、下記のサンプルコマンドで 必要な項目を修正して実行すれば問題なくインストールできます!修正が必要な項目は赤字の部分です。AADのユーザーや、ASDKをインストールするときに設定したパスワードなどですね。
# Install the AzureRM.Bootstrapper module, set the profile, and install the AzureRM and AzureStack modules.
Install-Module -Name AzureRm.BootStrapper -Force
Use-AzureRmProfile -Profile 2017-03-09-profile
Install-Module -Name AzureStack -RequiredVersion 1.2.11 -Force
# Use the NetBIOS name for the Azure Stack domain. On the Azure Stack SDK, the default is AzureStack and the default prefix is AzS.
# For integrated systems, the domain and the prefix are the same.
$domain = “AzureStack”
$prefix = “AzS”
$privilegedEndpoint = “$prefix-ERCS01”
# Point to the directory where the resource provider installation files were extracted.
$tempDir = ‘C:\TEMP\SQLRP’
# The service admin account (can be Azure Active Directory or Active Directory Federation Services).
$serviceAdmin = “admin@mydomain.onmicrosoft.com”
$AdminPass = ConvertTo-SecureString “P@ssw0rd1” -AsPlainText -Force
$AdminCreds = New-Object System.Management.Automation.PSCredential ($serviceAdmin, $AdminPass)
# Set credentials for the new Resource Provider VM.
$vmLocalAdminPass = ConvertTo-SecureString “P@ssw0rd1” -AsPlainText -Force
$vmLocalAdminCreds = New-Object System.Management.Automation.PSCredential (“sqlrpadmin”, $vmLocalAdminPass)
# And the cloudadmin credential that’s required for privileged endpoint access.
$CloudAdminPass = ConvertTo-SecureString “P@ssw0rd1” -AsPlainText -Force
$CloudAdminCreds = New-Object System.Management.Automation.PSCredential (“$domain\cloudadmin”, $CloudAdminPass)
# Change the following as appropriate.
$PfxPass = ConvertTo-SecureString “P@ssw0rd1” -AsPlainText -Force
# Change directory to the folder where you extracted the installation files.
# Then adjust the endpoints.
. $tempDir\DeploySQLProvider.ps1 -AzCredential $AdminCreds `
-VMLocalCredential $vmLocalAdminCreds `
-CloudAdminCredential $cloudAdminCreds `
-PrivilegedEndpoint $privilegedEndpoint `
-DefaultSSLCertificatePassword $PfxPass `
-DependencyFilesLocalPath $tempDir\cert
SQL RP のインストールが完了したあとは、Azure Stack 管理者ポータルからもジョブ完了の確認をすることができます。
1、管理者ポータルにログインして、Resource Group をクリック
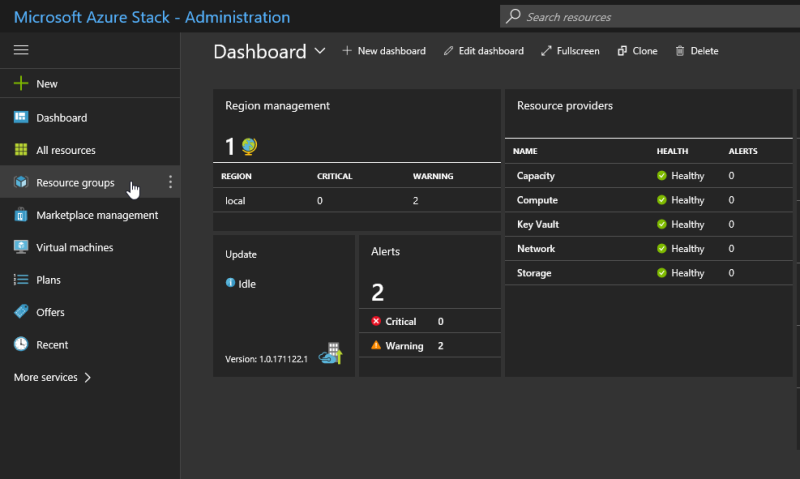
2、system.local.sqladapter をクリックし、Deployment で ”4 Succeeded” と表示されていれば問題ありません。
これで、SQL RP のインストールは完了です。このあと、SQL ホスティングサーバーを構成すれば、MSDBaaS を提供できるようになります!